Need to know when a liquid chamber is about to overflow?
Follow the instructions below to assemble a buzzer warning system using a float switch, 9V battery clip, buzzer and a 9V battery.
Alert system assembly steps
1. Our i-float float switches are delivered to you in a “normally closed” state. For this application, we want the switch to complete a circuit when the float rises, so we need the switch to be “normally open.” Simply remove the bottom clip from underneath the float, remove the float, turn it upside down, replace the float on the stem and re-attach the bottom clip. Now the float switch will turn on the buzzer when water causes the float to rise.
2. Strip the ends from the float switch, buzzer and battery clip wires. Twist connect one float switch wire to the black lead from the battery snap and the other to the black lead from the buzzer. Then twist connect the two remaining red wires, as shown below. Use wire caps on all of the connections (only one connection is shown capped below so that you can see the wire connections).
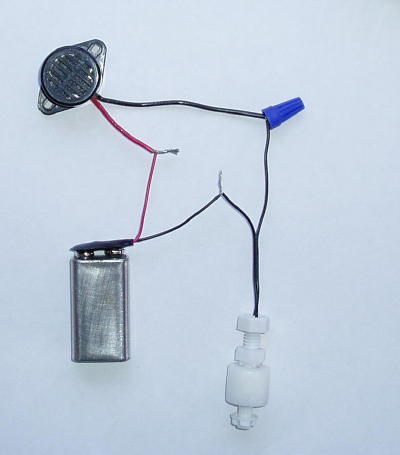
3. Attach the battery and gently lift the float on the float switch to test the system. The buzzer will sound. NEVER USE A RECHARGEABLE BATTERY IN THIS OR ANY APPLICATION WHERE IT COULD GET WET. RECHARGEABLE BATTERIES CAN EXPLODE IF SHORTED.
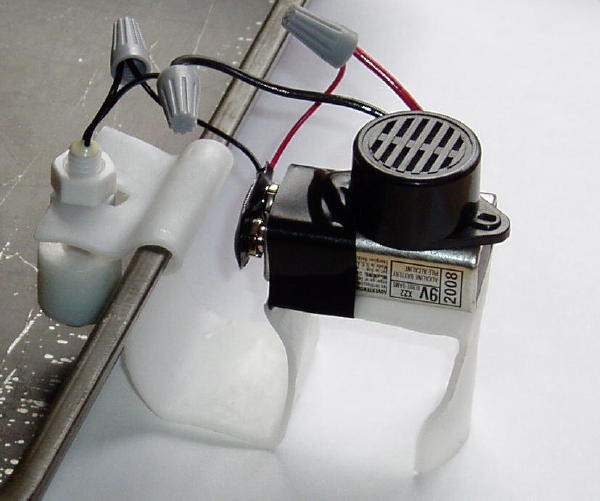
4. Use our Mold-a-Holder product to create a mount for the float switch and a small platform to keep the buzzer and battery away from what could be a wet surface. The photo below shows an example. Mold-a-Holder is flexible and very easy to work with. See our Mold-a-Holder instructions. Make a mount that is suitable for your pan and situation. Just keep the battery up off the floor.
A good alkaline battery will operate the buzzer for 3 to 8 hours. Replace your battery every 6-12 months or whenever your alarm sounds for more than a few minutes.